
Homemade Bread Recipe success starts with the simple magic of flour, water, and yeast. There is nothing quite like the aroma of a fresh loaf cooling on your counter, filling your home with a sense of warmth and comfort. While many people feel intimidated by the idea of baking from scratch, mastering a basic loaf is much easier than you might think. With a little patience and the right technique, you can skip the store-bought aisles and enjoy the superior taste of artisanal bread right in your own kitchen. 🥖
Table of Contents
The Essentials of a Great Homemade Bread Recipe
Understanding the science behind your dough is the first step toward baking excellence. At its core, any reliable Homemade Bread Recipe relies on the interaction between yeast and sugars. When yeast is hydrated in warm water, it begins to consume the carbohydrates in the flour, releasing carbon dioxide. These gas bubbles are trapped by the gluten network—the “elastic” structure formed when you knead the dough—causing the bread to rise.
To achieve that classic chewy interior and crispy crust shown in professional bakeries, using high-quality bread flour is often recommended because of its higher protein content. However, all-purpose flour works wonderfully for softer, more versatile sandwich loaves. The beauty of baking at home is that you have total control over the ingredients, ensuring no unnecessary preservatives or additives make it into your family’s meals.
Ingredients You Will Need
To follow this Homemade Bread Recipe, gather these simple pantry staples:
- Bread Flour: 500g (approx. 4 cups) for a sturdy structure.
- Warm Water: 350ml (around 105°F or 40°C) to activate the yeast.
- Active Dry Yeast: 7g (1 packet).
- Salt: 10g (2 teaspoons) for flavor and to control the yeast growth.
- Sugar: 1 tablespoon to help the yeast bloom and the crust brown.
- Olive Oil: 2 tablespoons for a softer crumb and easier handling.
Step-by-Step Instructions for Your Homemade Bread Recipe
Baking is a tactile process. Follow these steps carefully to ensure your dough develops the perfect texture and flavor.
Step 1: Activate the Yeast
In a large glass bowl, combine the warm water, sugar, and yeast. Stir gently and let it sit for about 5–10 minutes. You will know it is ready when a frothy, bubbly layer forms on the surface.
Step 2: Mix the Dough
Add the olive oil and salt to the yeast mixture. Gradually stir in the flour, one cup at a time, until a shaggy dough begins to form. If you are using a stand mixer, use the dough hook attachment on low speed.
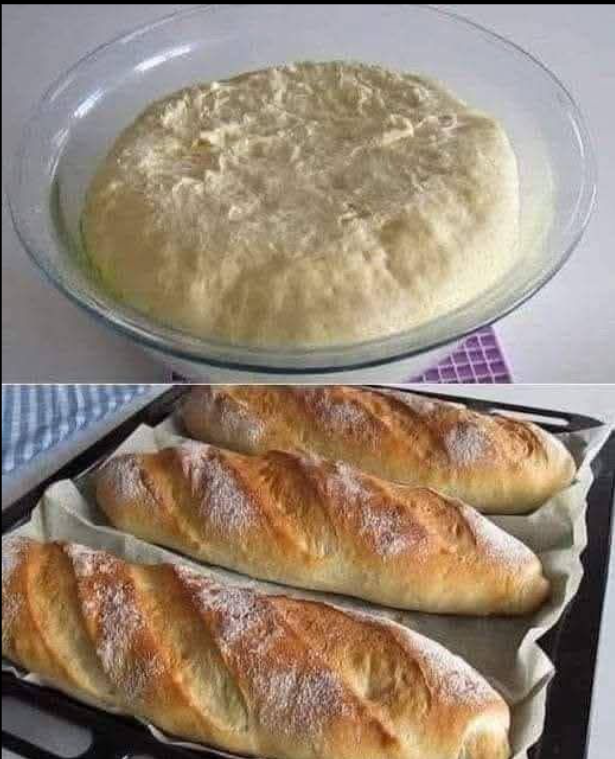
Step 3: The First Rise
Lightly grease a bowl with oil and place the dough inside. Cover it with a damp cloth or plastic wrap. Place it in a warm, draft-free spot and let it rise for about 60 to 90 minutes, or until it has doubled in size. 🍞
Step 4: Shaping and Scoring
Gently punch down the dough to release excess air. Turn it out onto a floured surface and divide it into two or three portions. Shape them into long baguettes or round boules. Use a sharp knife or a “lame” to create 3–4 diagonal slashes across the top; this allows the bread to expand evenly in the oven.
Step 5: The Second Rise
Place your shaped loaves on a baking sheet lined with parchment paper. Cover them lightly and let them rest for another 30–45 minutes. This “second proof” is vital for a light, airy texture.
Step 6: Baking to Perfection
Preheat your oven to 425°F or 220°C. For a crispier crust, you can place a shallow pan of water on the bottom rack to create steam. Bake the loaves for 25–30 minutes until they are deep golden brown and sound hollow when tapped on the bottom.

Tips for Customizing Your Homemade Bread Recipe
Once you have mastered the basic version, this Homemade Bread Recipe becomes a canvas for your creativity. You can fold in roasted garlic, fresh rosemary, or even sun-dried tomatoes during the mixing phase to create specialty loaves. 🌿
A helpful factual tip: The temperature of your kitchen significantly impacts rise times. In a cooler room, your dough may take twice as long to double in size compared to a warm summer day. If your house is cold, you can place the dough inside an oven that is turned off but has the oven light turned on; the small amount of heat from the bulb creates a perfect proofing environment.
Final Thoughts on Mastering Your Loaf
Baking is as much an art as it is a science. While your first attempt might not look like a professional photograph, the taste will undoubtedly surpass anything found in a plastic bag at the grocery store. Using a consistent Homemade Bread Recipe allows you to build “baker’s intuition,” eventually knowing by the
